
Hey everyone, Kate here! In this video, I’m doing some abstract watercolor painting with blobs and drips, letting the colors flow together on the page before turning it into a drawing.
I decided to experiment with a few things today. First, I broke out my MozArt Komorebi watercolors, which I wanted to play around with. I also wanted to see how the paint performed on a basic watercolor paper from Artist’s Loft at Michaels. It’s definitely more affordable than my usual 100% cotton paper, but I was curious how it would work.
While the cotton paper is my usual go-to, I know a lot of people use cellulose paper, and this was a fun way to explore a different option. The paint sinks into the paper grooves a little bit, creating a unique texture that I don’t get with my usual paper.
For this painting, I used some of my favorite colors – turquoise, greens, and earthy tones. I spread blobs of these colors on the paper, letting them mix and flow together. I worked pretty wet, taping down the edges of the paper with washi tape to keep everything in place.
Since the Komorebi palette doesn’t have its own mixing wells, I used some sauce cups from my kitchen! They work perfectly for watercolors and are easy to clean up afterwards. Of course, once you use for art, you probably shouldn’t use for food!
After the first layer dried, I went in with a second coat to darken things up and add more texture. I also rewet some of the leftover turquoise paint to create even more variation. I wanted the blobs and shapes to serve as the base for a future drawing.
While working on the second layer, I noticed some areas where the water had pooled a little, creating slightly lighter areas and a bit of blooming on the paper. This is something to keep in mind if you don’t want that kind of effect.
Next, I decided to incorporate some metallics. I dipped into the metallic red ochre, unsure of how it would react with the wet blues and greens. But it turned out beautifully, adding a subtle shine.
I also brought back some of the golden brown colors I used at the beginning, which had gotten covered up by the greens and blues. This helped to add some warmth back into the painting.
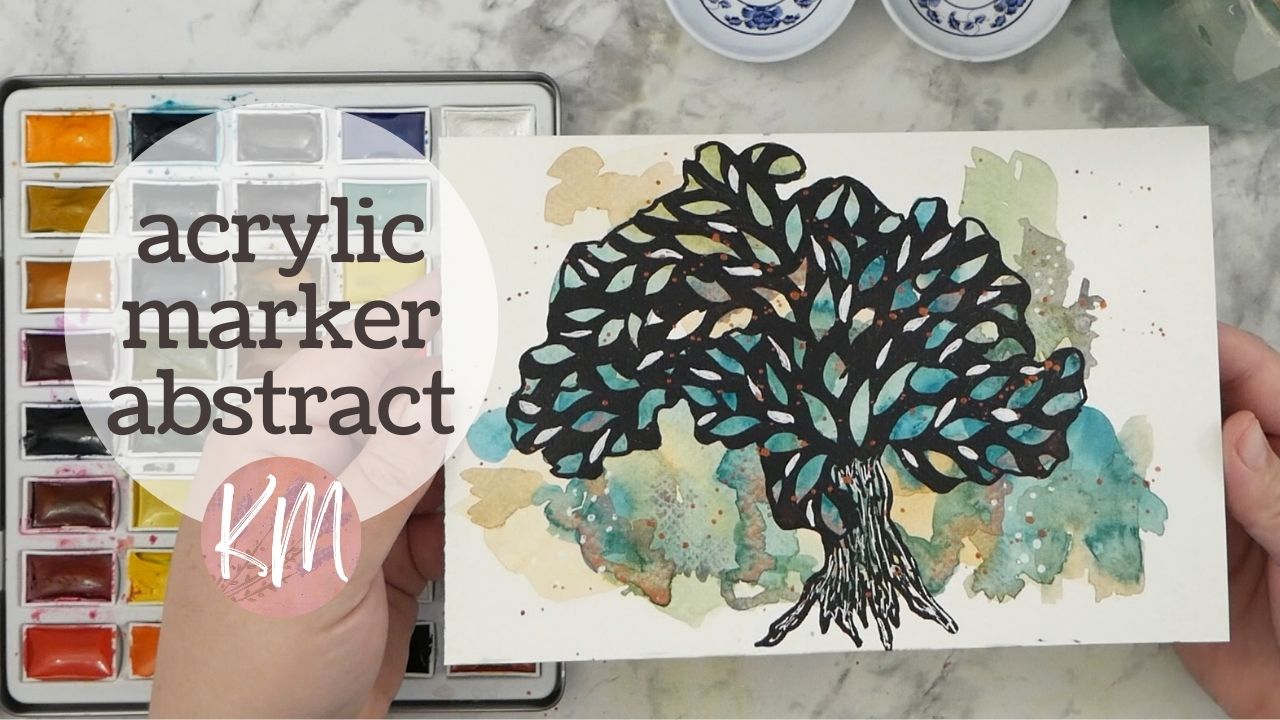
Then, I let everything dry completely. As I was waiting, I started to see shapes emerge from the abstract colors. One shape that popped out to me was a tree – a kind of scraggly tree with lots of limbs and leaves.
To create the tree, I used an acrylic paint marker from Hobby Lobby. I traced the lines I saw emerging from the paint, creating a basic tree shape and a trunk. I really like the organic feel of this technique – it’s like looking for shapes in clouds and letting your creativity flow.
I added some extra details to fill out the tree shape, even turning a blob at the bottom into another branch. I then filled in the trunk area with the paint marker, making it look textured like bark.
For the leaves, I followed the natural branches and added them coming out from the center. I wanted them to be transparent, allowing the background paint to show through. I then colored in all the leaves, creating a multicolored and multi-toned pattern.
I really liked how this turned out! The black paint marker from the tree branches also helped to knock back some of the busyness of the background and make everything stand out more.
To add some more highlights and details, I used a white Gelly Roll pen. I added white leaves scattered around the black paint marker and on the tree trunk. I also wanted to bring out a little more of the metallic red ochre, so I added some more splashes of that color for a shiny look.
Finally, I took off the tape and admired the finished product! This was such a fun zen experience, and like always, I included a close-up of the painting at the end of the video.
This is a great technique to try because you don’t need a lot of supplies. Just a marker, some watercolors, and your creativity can do the trick! Thanks for watching, and until next time, keep creating!