
Hey everyone, Kate here with a new art journal! Today, I’m feeling experimental and want to try a few things with you. Grab your art journal, scrap paper, any art supplies you have on hand. We’re diving in!
First, I’m grabbing a black fine-tip marker and making some loose, scribbly lines on my pre-painted pages. It’s almost like cursive writing, but nonsensical. I layer on these scribbles with different angles for some variety.
Now, onto the homemade stencils! I cut out a couple of shapes from cardstock. We’ll be using acrylics today, but feel free to use whatever paints you have. I start with a white gesso mixed with a touch of yellow ochre. This light color will create a nice contrast with the darker background.
I grab my makeup sponge – a great tool for stenciling! – and dab the paint mixture onto the stencil.
Next, I mix some burnt sienna and raw umber for a warm earthy tone. I also have some olive green, crimson, yellow ochre, and phthalo blue for a cool contrast.
Using another stencil and the same sponge, I layer on a light green color. For a darker contrast, I switch to burnt umber and a diamond-shaped stencil. This creates a fantastic textured background, perfect for the abstract landscape we’re building.
While the paint dries, I mix some of the burnt umber with a touch of iridescent white for a subtle sheen. I want the background to remain dark but with a hint of shimmer. This paint is applied with a brush and a custom mountain-shaped stencil.
After letting everything dry completely, I come back in with the blue and iridescent white mixture. This time, I use a circular stencil to add some cloud hints.
Now, for some texture! I grab a baby wipe dabbed with some of the dark blue paint and blot it onto the painted circles.
I use the baby wipe again, this time with some iridescent white, to add a touch of fog rising between the mountains. I also brush a light coat of some olive green over the mountains, creating a subtle suggestion of foliage.
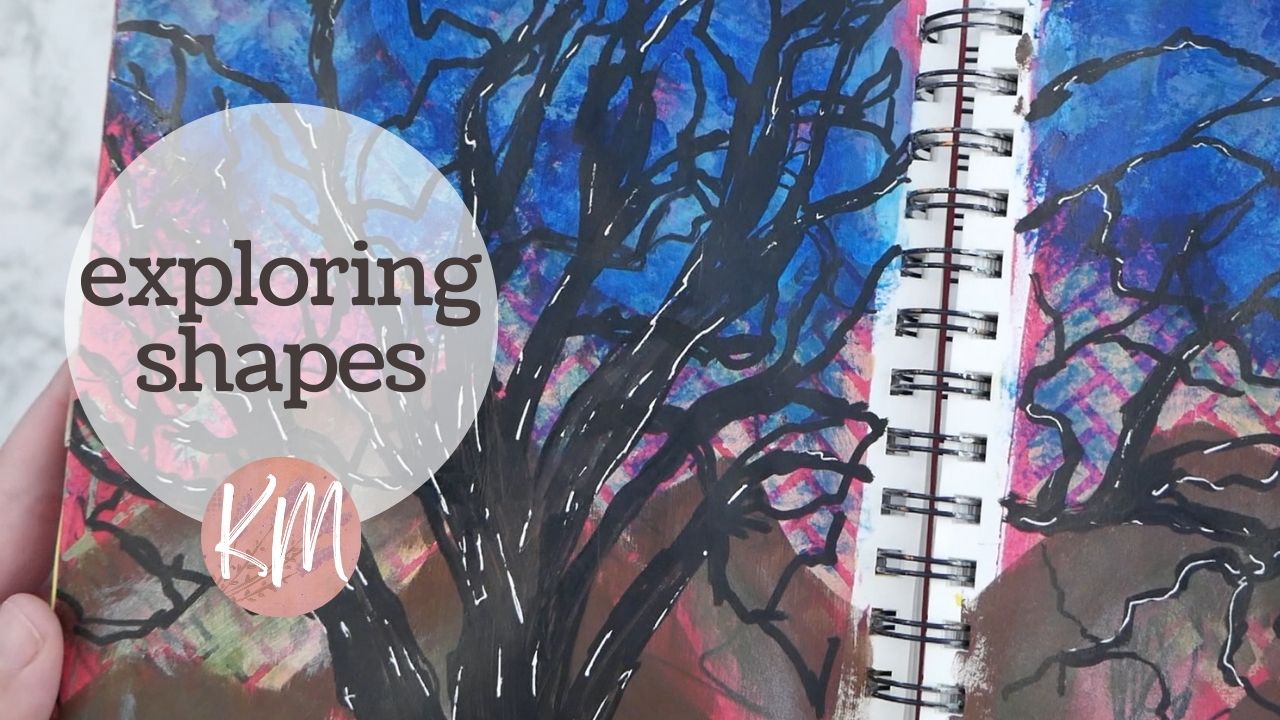
Time for the foreground! I imagine a large, scraggly tree silhouetted against the landscape. Using my black marker, I draw the basic tree shape with thick, rough branches.
Next comes the fun part – filling in the tree with the marker. I keep the branches looking random and natural, avoiding a perfectly symmetrical form. Trees grow in all sorts of directions, so embrace the randomness!
To add some subtle highlights to the tree, I use a white Gelly Roll pen. This creates a hint of moonlight or light hitting the branches in certain spots. Don’t worry about perfect lines; a loose, scribbly approach works well here.
Now we have a unique landscape with a funky sky and a dramatic tree in the foreground. This project is all about playing with colors, shapes, and homemade stencils. Stencils are a fantastic way to create cool textures, and you can easily make your own with cardstock and an X-ACTO knife or scissors.
I really love the final piece – the iridescent sheen, the contrasting colors, and the fun shapes. So, why not grab your art supplies and join me in some creative journaling? Until next time, keep on creating!