
Hey everyone! It’s Kate here, playing with watercolors again. This time I wanted to create a fun background with some blues and greens, my favorite color combo. I used a dragging technique where you can get a hard edge on one side and a soft edge on the other. It lets you blend the colors beautifully, and I love the soft, cloudy effect it creates. There are other ways to add texture with watercolors, like salt or water flicks, but today I just went for the clean, blended look.
Watercolor is all about experimentation, and that’s exactly what I did with this piece. I threw in some of my favorite yellow ochre for some richness, and it worked perfectly with the blues and greens. Since the paint wasn’t completely dry, the yellow stayed put when I went over it again, creating a nice transparent layer. I love how you can see all the different layers peeking through!
I used a quill brush for this piece. It holds a lot of water, so I had to do some blotting to avoid puddles. It’s a new brush, so I’m still getting used to how much water it holds and how it performs on paper. That’s the fun part about new brushes, though – figuring out how they work and finding your favorites. This quill brush is great because it can handle big areas of color but also comes to a nice fine tip, perfect for detail work.
Once I got to the bottom of the paper, I decided to extend those cloudy marks up the sides and across the top to fill the whole page. I love backgrounds like this because they’re so versatile – you can draw or doodle anything on them, and the colors create endless possibilities. It’s a great base to work from and lets you create something truly beautiful.
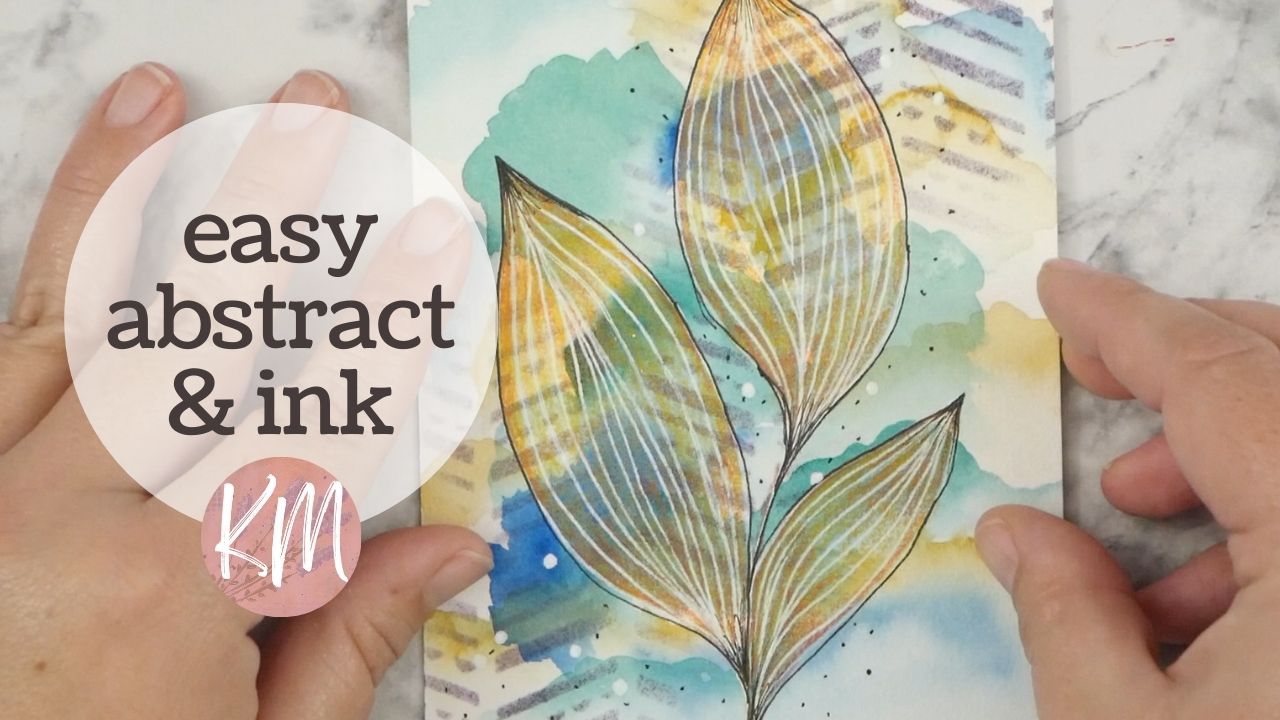
After the watercolor dried, I pulled out some stamps and stencils for a bit of fun. I used some purple ink, and my better half hilariously thought the stamped shapes looked like tire tracks! Now I can’t unsee them, but hey, at least I have some leafy tire tracks. I also added some lines with a Uniball pen and colored in the leaves with bright, cheerful yellow pencils. I threw in some other colors and a black fine liner pen for accents, and really liked how the yellow in the leaves echoed the yellow in the background.
Finally, I wanted to make the leaves stand out even more, so I outlined them with a brand new, super-fine black liner pen. It’s so nice to write with a fresh pen! I added some wispy lines at the edges for shading, and then decided to take it a step further. I used the fine liner to add some black dots to the background, some of which blend in with the darker paint. I just wanted a little something extra to bring the black beyond the leaf outlines and add some texture with the stamping. For a finishing touch, I used a white pen to create some big, white dots, especially over the darker areas. This kept the diagonal line going from the stamping and tied everything together nicely.
I hope you enjoyed creating this fun and easy background with me! Give it a try yourself, and happy crafting!